- Introduction
- 1. What do you get ?
- 2. The Theme
- 3. Installation
- 4. Dummy Data
- 5. Setup
- 6. Theme Options Panel
- 7. Visual Composer
- 8. Credits
- 9. FAQ
- Published using GitBook
Populating Footer Widget Area
- Navigate to Static Content > Add New.
- Give it a title, lets say "Footer Widgets" item. The title is not used anywhere in displaying the menu.
- Click on Backend Editor. It will display Visual Composer Backend Editor. We will use this back end editor to build our footer widget area.
- Footer Widget Area has two rows,each with six columns.
Here is the footer widget area setting
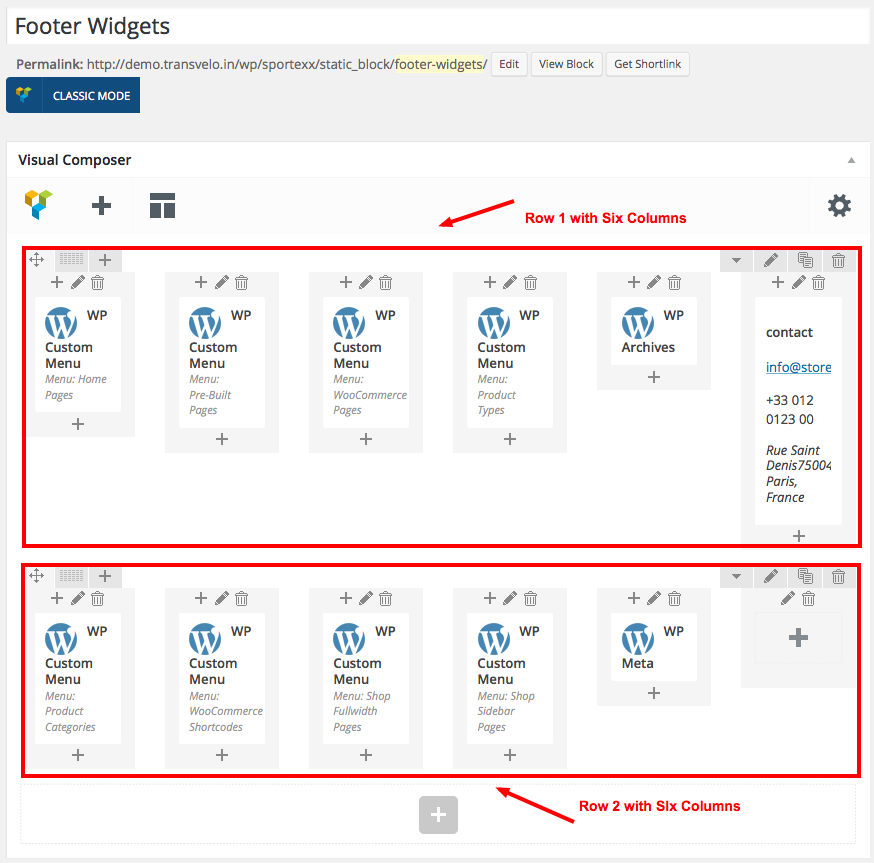
Row 1
Column 1 - Click on the Add button. It should popup Add Element button. Let us add WP Custom Menu widget under Wordpress Widgets. I have already created a menu (via Appearance > Menus).
- Widget Title : Home Pages
- Menu : Home Pages ( name of the menu created already)

- Column 2 - Click on the Add button. It should popup Add Element button. Let us add WP Custom Menu widget under Wordpress Widgets. I have already created a menu (via Appearance > Menus).
- Widget Title : Pre-built Pages
- Menu : Pre-built Pages ( name of the menu created already)
- Column 3 - Click on the Add button. It should popup Add Element button. Let us add WP Custom Menu widget under Wordpress Widgets. I have already created a menu (via Appearance > Menus).
- Widget Title : WooCommerce
- Menu : WooCommerce Pages ( name of the menu created already)
- Column 4 - Click on the Add button. It should popup Add Element button. Let us add WP Custom Menu widget under Wordpress Widgets. I have already created a menu (via Appearance > Menus).
- Widget Title : Product Types
- Menu : Product Types ( name of the menu created already)
- Column 5 - Click on the Add button. It should popup Add Element button. Let us add WP Custom Menu widget under Wordpress Widgets. I have already created a menu (via Appearance > Menus).
- Widget Title : Blog
- Display Options : Dropdown or Show Post Counts
- Column 6 : Click on the Add button and add Text Block under Content. Edit the text block and add this code :
<div class="widget footer-widget">
<h4 class="widget-title">contact</h4>
<a class="mail-to" href="#">info@store.com</a>

<span class="tel-to">+33 012 0123 00</span>

<address>Rue Saint Denis75004 Paris, France</address></div>
Row 2
- Column 1 - Click on the Add button. It should popup Add Element button. Let us add WP Custom Menu widget under Wordpress Widgets. I have already created a menu (via Appearance > Menus).
- Widget Title : Categories
- Menu : Product Categories ( name of the menu created already)
- Column 2 - Click on the Add button. It should popup Add Element button. Let us add WP Custom Menu widget under Wordpress Widgets. I have already created a menu (via Appearance > Menus).
- Widget Title : Shortcodes
- Menu : WooCommerce Shortcodes ( name of the menu created already)
- Column 3 - Click on the Add button. It should popup Add Element button. Let us add WP Custom Menu widget under Wordpress Widgets. I have already created a menu (via Appearance > Menus).
- Widget Title : Shop Fullwidth
- Menu : Shop Fullwidth Pages ( name of the menu created already)
- Column 4 - Click on the Add button. It should popup Add Element button. Let us add WP Custom Menu widget under Wordpress Widgets. I have already created a menu (via Appearance > Menus).
- Widget Title : Shop Sidebar
- Menu : Shop Sidebar Types ( name of the menu created already)
- Column 5 - Click on the Add button. It should popup Add Element button. Let us add WP Meta widget under Wordpress Widgets.
- Widget Title : Meta
- Display Options : Dropdown or Show Post Count
Sample Output of Footer Widget Area
