- Introduction
- 1. What do you get ?
- 2. The Theme
- 3. Installation
- 4. Dummy Data
-
5.
Setup
- 5.1. General
- 5.2. Adding Products
- 5.3. Product Archive/Shop Page
- 5.4. Blog Page
- 5.5. Building Pages
- 5.6. Navigation
-
5.7.
Pre-Built Pages
- 5.7.1. About Page
- 5.7.2. Contact v1 Page
- 5.7.3. Contact v2 Page
- 5.7.4. FAQ Page
- 5.7.5. Terms and Conditions Page
- 5.7.6. Track your Order
- 5.7.7. Home v1
- 5.7.8. Home v1 with Visual Composer
- 5.7.9. Home v2
- 5.7.10. Home v2 with Visual Composer
- 5.7.11. Home v3
- 5.7.12. Store Directory
- 5.7.13. Home v3 with Visual Composer
- 5.8. WooCommerce Pages
-
5.9.
Static Content
- 5.9.1. Recommended Products Cards Carousel
- 5.9.2. Accessories Jumbotron
- 5.9.3. Pages Megamenu Item
- 5.9.4. Smartphones Jumbotron
- 5.9.5. Car, Motorbike & Industrial
- 5.9.6. TV & Audio Megamenu Item
- 5.9.7. Watches & Eyewear Megamenu Item
- 5.9.8. Movies, Music & Video Games Megamenu Item
- 5.9.9. Mobiles & Tablets Megamenu Item
- 5.9.10. Computers & Accessories Megamenu Item
- 5.9.11. Cameras, Audio & Video Megamenu Item
- 6. Theme Options Panel
-
7.
Visual Composer
- 7.1. Jumbotron
- 7.2. Products Tabs
- 7.3. Products Carousel Tabs
- 7.4. Electro Products Cards Carousel
- 7.5. Electro Products Carousel
- 7.6. Electro Brands Carousel
- 7.7. Product List Categories
- 7.8. Product 2-1-2 Grid
- 7.9. Product 6-1 Grid
- 7.10. Electro Onsale Product
- 7.11. Electro Onsale Products Carousel
- 7.12. Electro Team Member
- 8. Credits
- 9. FAQ
- Published using GitBook
Advanced Megamenu Dropdown
We built our simple Megamenu in previous section. We are now going to build a little complex mega menu using Visual Composer.
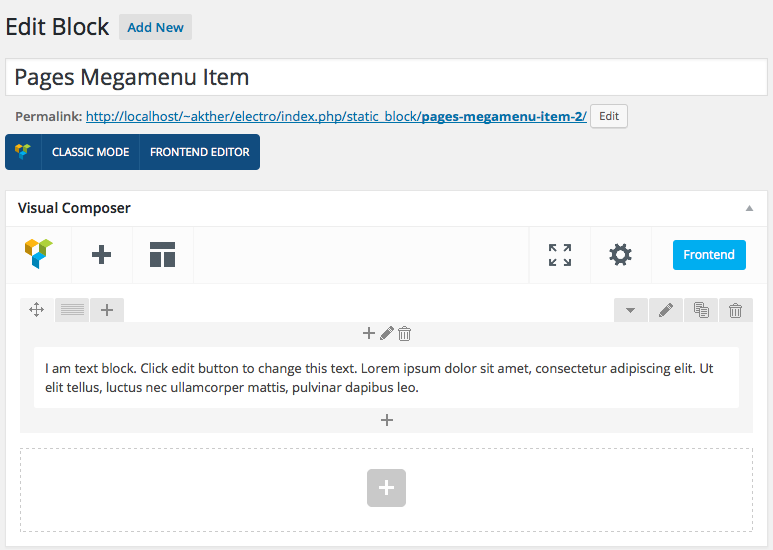
Revisiting Test Megamenu Item Static Block
- Navigate to Static Content > Static Blocks.
- It should display the "Pages Megamenu Item" that we created from previous section.
- Click on edit and you should see an existing text block.
- Delete the text edit block by hovering over the block and clicking on the button which has the trash icon.
A complex Megamenu Item
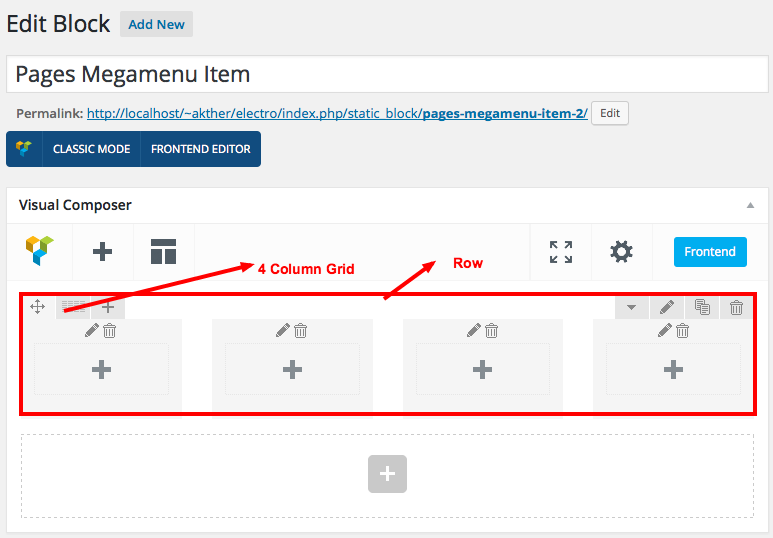
1. The Grid
- Our Complex Megamenu item will now have 4 columns.
- On the top-right of each row, you will find a grid icon, next to the move icon.
- Click on the grid icon and it will expand to various grid option available.
- We will select a predefined grid which is 1/4 + 1/4 + 1/4 + 1/4.
- Once you click on the predefined grid layout it will look like this :
2. Populating the Grid
- Visual Composer comes with lot of elements that can be added to the Grid.
Row 1 has 4 columns.
- Column 1 - Click on the Add button. It should popup Add Element button. Let us add WP Custom Menu widget under Wordpress Widgets. I have already created a menu (via Appearance > Menus).
- Widget Title :
- Menu : Pages Menu #1 ( name of the menu created already)
- Column 2 - Click on the Add button. It should popup Add Element button. Let us add WP Custom Menu widget under Wordpress Widgets. I have already created a menu (via Appearance > Menus).
- Widget Title :
- Menu : Pages Menu #2 ( name of the menu created already)
- Column 3 - Click on the Add button. It should popup Add Element button. Let us add WP Custom Menu widget under Wordpress Widgets. I have already created a menu (via Appearance > Menus).
- Widget Title :
- Menu : Pages Menu #3 ( name of the menu created already)
- Column 4 - Click on the Add button. It should popup Add Element button. Let us add WP Custom Menu widget under Wordpress Widgets. I have already created a menu (via Appearance > Menus).
- Widget Title :
- Menu : Pages Menu #4 ( name of the menu created already)
3. How does the Grid look after populating ?
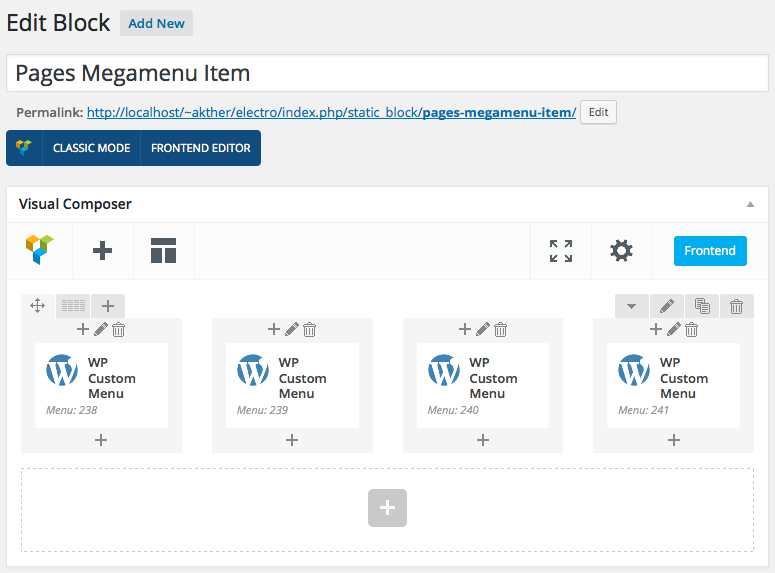
Click on Publish button and view the output.
4. Making the megamenu dropdown as full-width
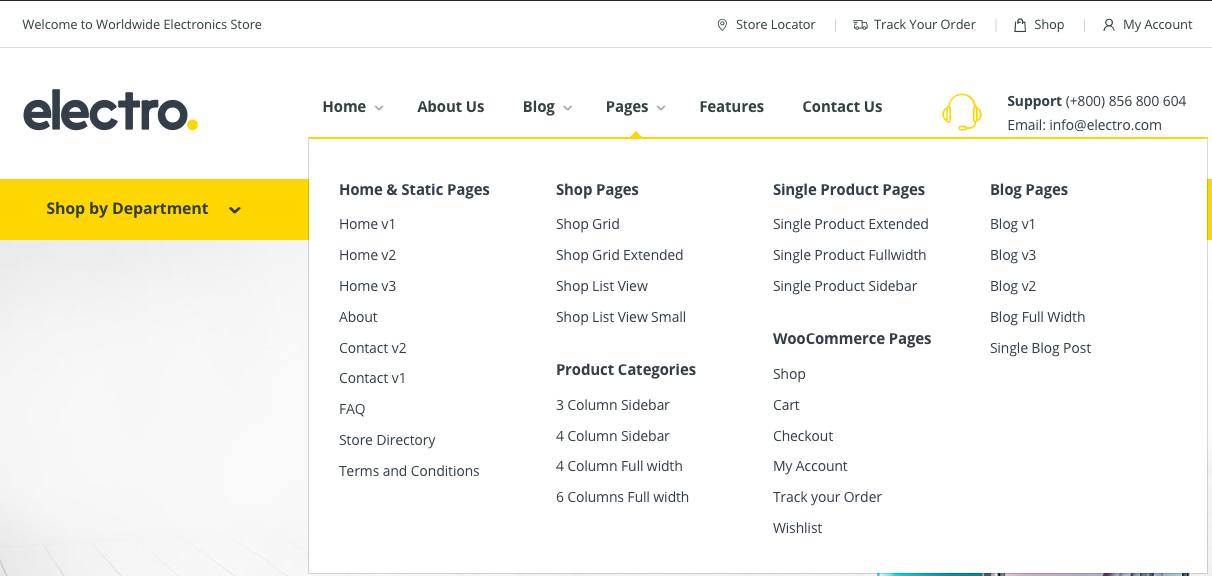
The megamenu now looks advanced and neat. What if we want the megamenu to be full width ? It is easy.
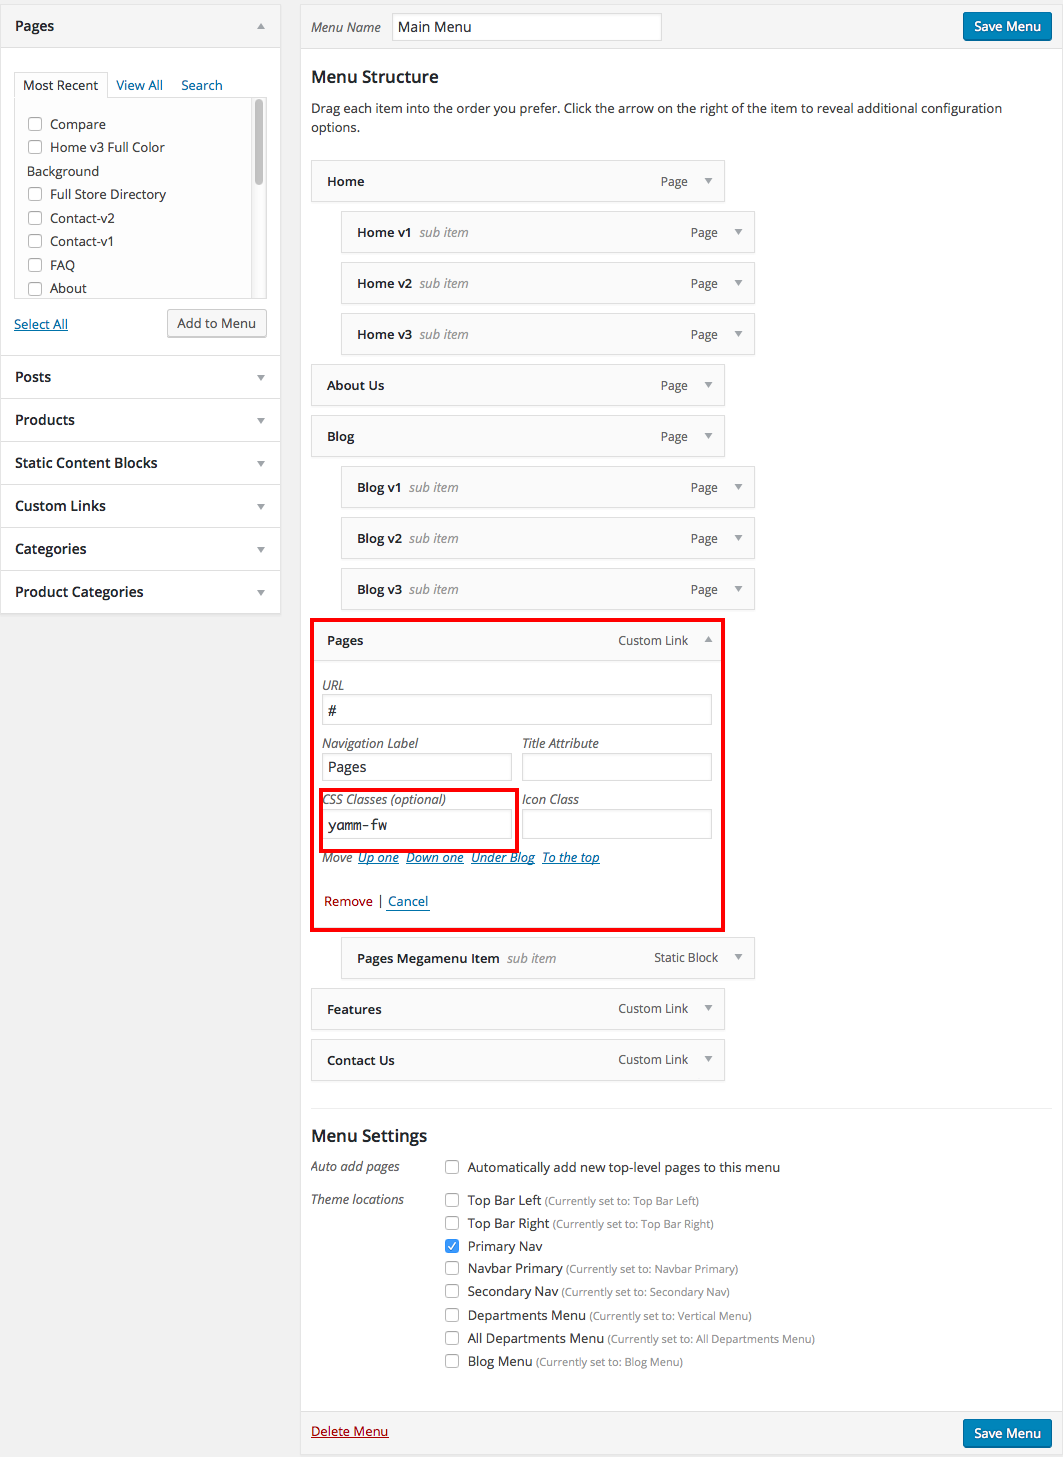
- Go back to Appearance > Menus .
- Click on the caret on the top-right of menu item that contains the megamenu subitem to expand it.
- In the CSS Classes text box, enter
yamm-fw. This will make the subitem extend to full width of the container. - If the CSS Classes field is not visible. Click on Screen Options on the top-right corner of the screen and check on CSS Classess under Show advanced menu properties.
- Click on Save Menu.
5. Megamenu Full-width
6. Making the megamenu dropdown as 3 Half of the width
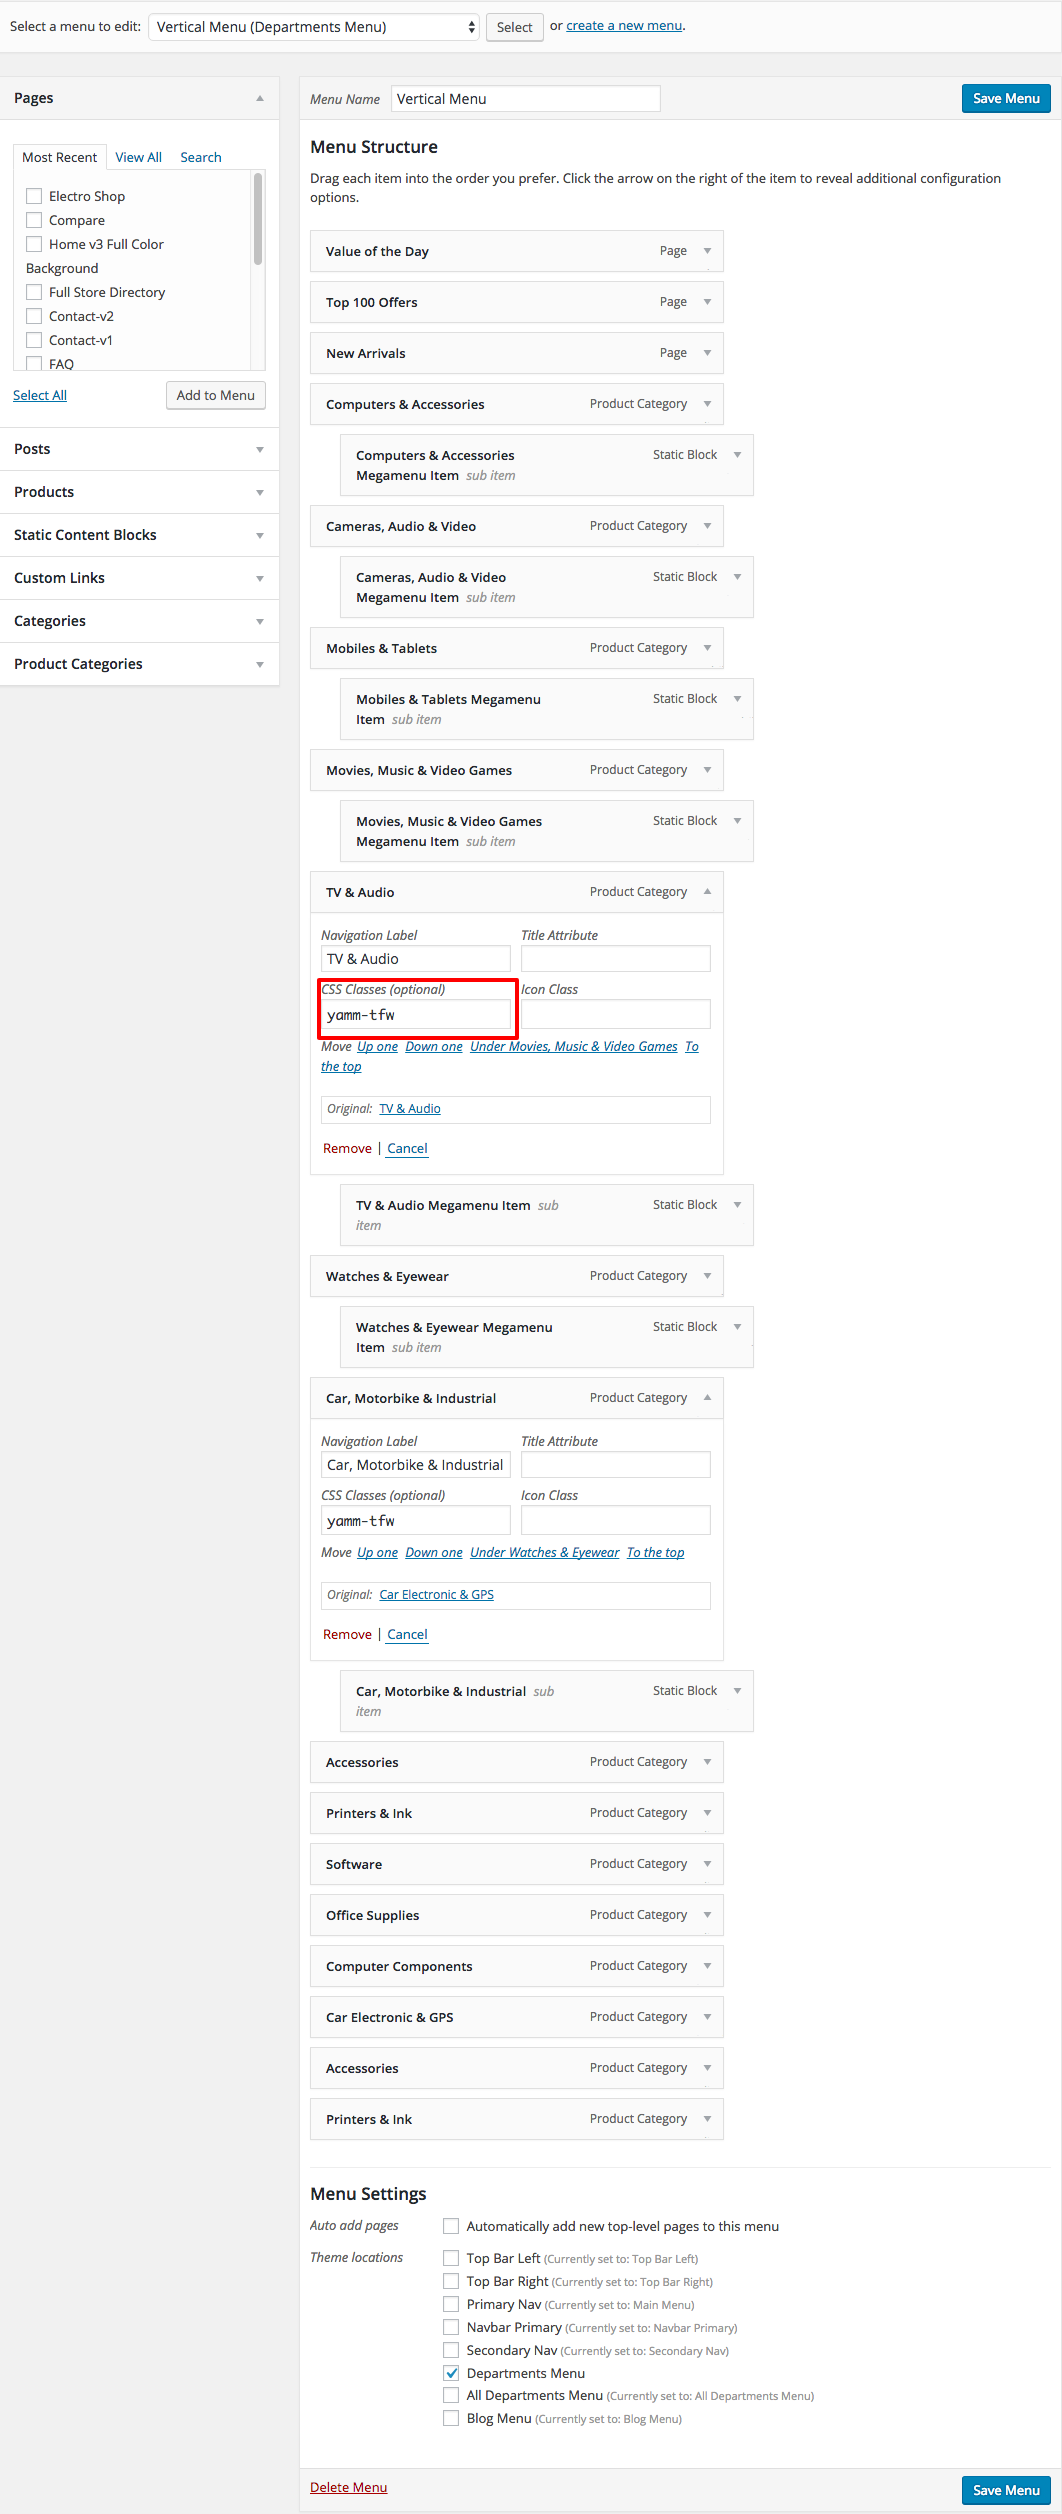
- Go back to Appearance > Menus .
- Click on the caret on the top-right of menu item that contains the megamenu subitem to expand it.
- In the CSS Classes text box, enter
yamm-tfw. - This will make the subitem extend to 3 half-width of the container.
- If the CSS Classes field is not visible. Click on Screen Options on the top-right corner of the screen and check on CSS Classess under Show advanced menu properties.
- Click on Save Menu.
7. Megamenu 3 Half of the width

8. Making the megamenu dropdown as half of the width
- Go back to Appearance > Menus .
- Click on the caret on the top-right of menu item that contains the megamenu subitem to expand it.
- In the CSS Classes text box, enter
yamm-hw. - This will make the subitem extend to half of the container.
- If the CSS Classes field is not visible. Click on Screen Options on the top-right corner of the screen and check on CSS Classess under Show advanced menu properties.
- Click on Save Menu.
9. To make the Menu Item as Highlight or Bold
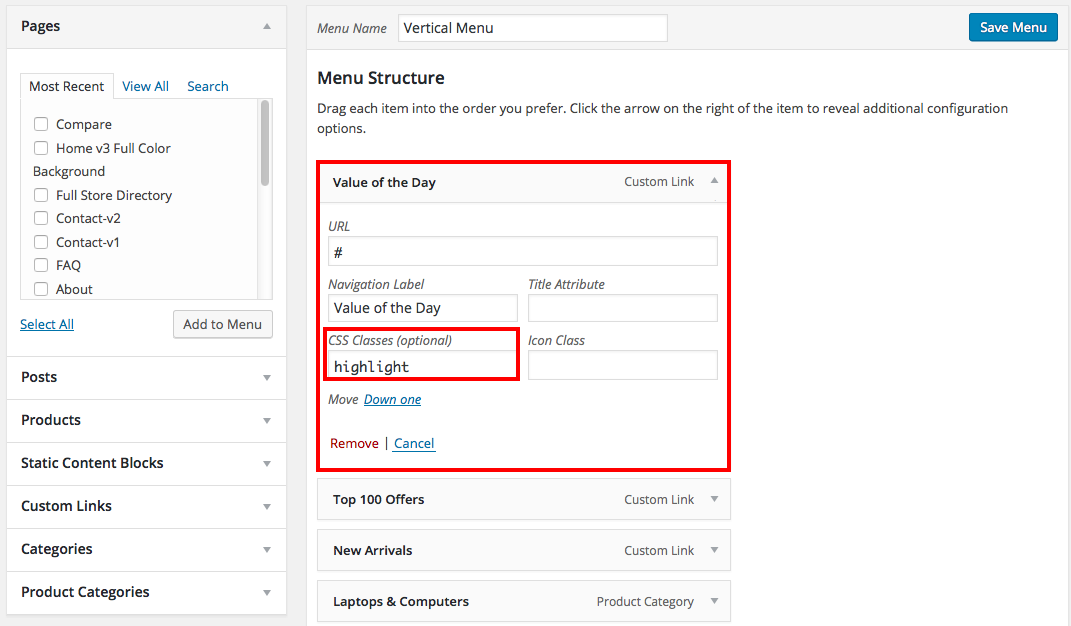
- Go back to Appearance > Menus .
- Click on the caret on the top-right of menu item that contains the megamenu subitem to expand it.
- In the CSS Classes text box, enter
highlight. This will make the menu item as BOLD. - If the CSS Classes field is not visible. Click on Screen Options on the top-right corner of the screen and check on CSS Classess under Show advanced menu properties.
- Click on Save Menu.
10. The Output of the Highlight Menu

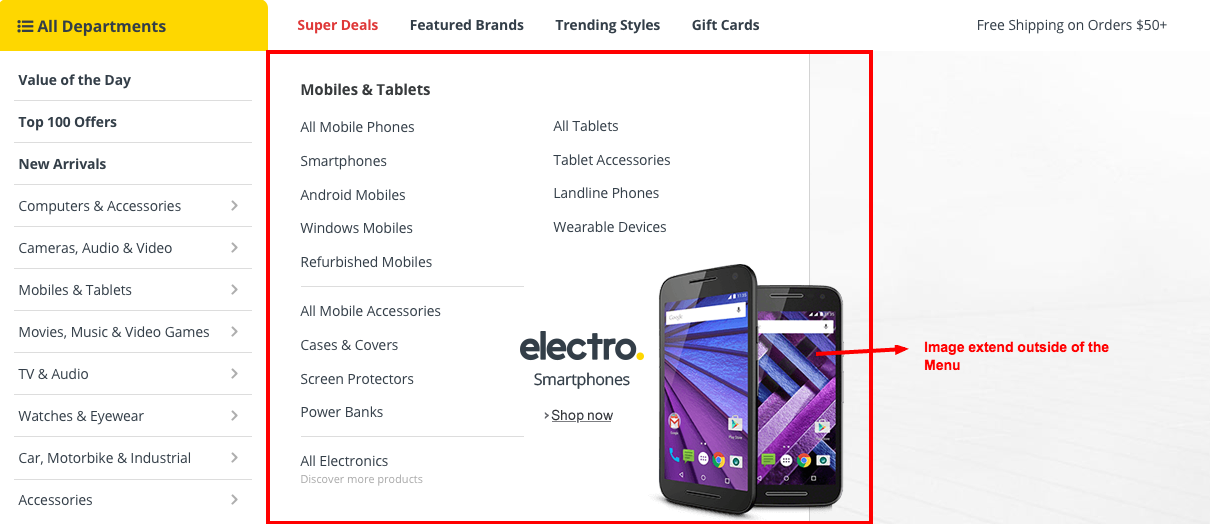
11. Adding Class Name for Single Image which extend outside of the content area in Vertical Menu
- Navigate to Static Content > Add New.
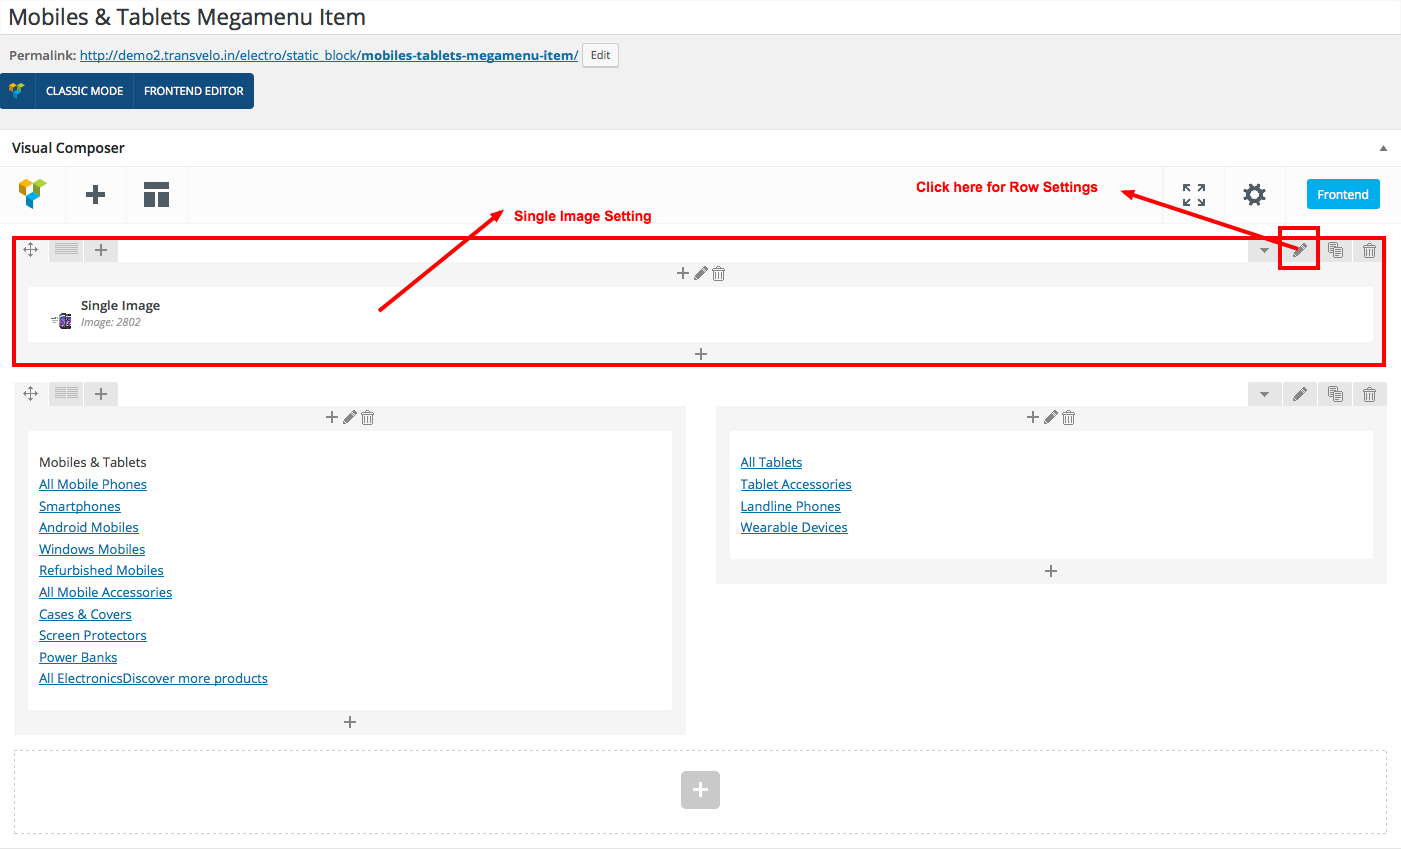
- Give it a title, lets say "Mobiles & Tablets Megamenu Item". The title is not used anywhere in displaying the menu.
- Click on Backend Editor. It will display Visual Composer Backend Editor. We will use this back end editor to build our Mobiles & Tablets Megamenu Item.
- Mobiles & Tablets Megamenu Item has 2 rows.
- First row has Single Image Setting. Here is the screenshot for Single Image Setting.
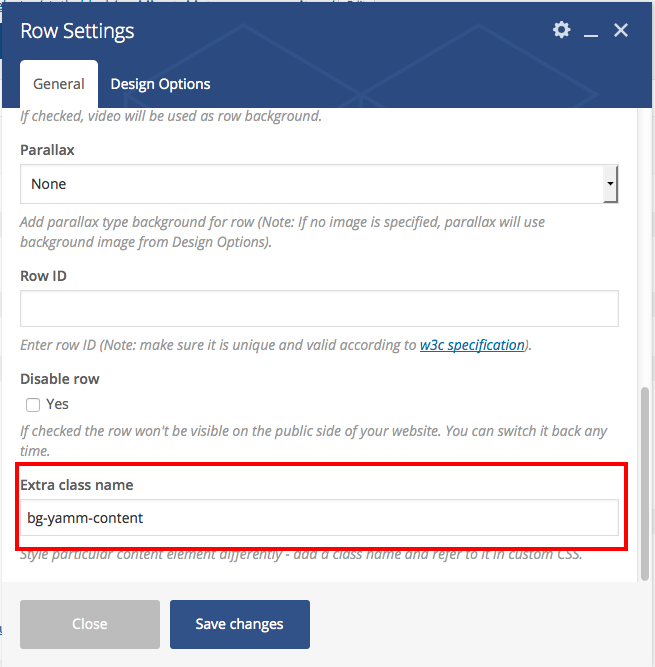
- On the Row settings of the Single Image Block, add the class name bg-yamm-content in
Extra Class Name option. Here is the screenshot for your refenece
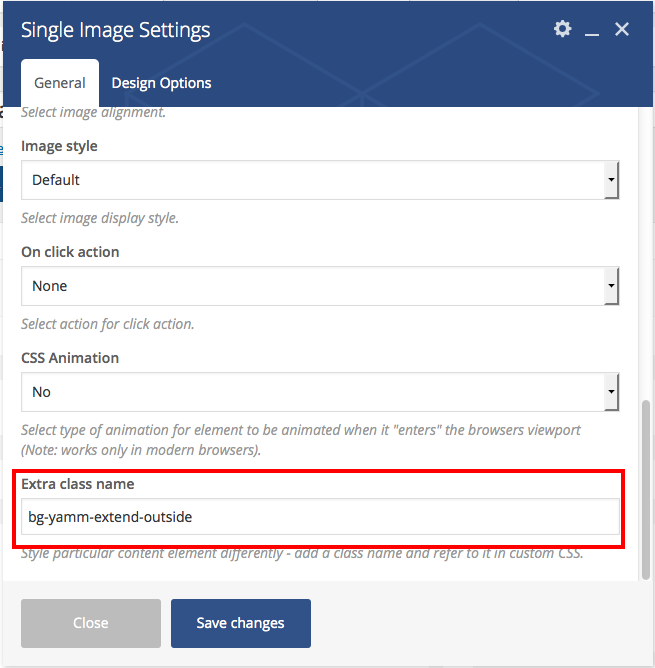
- In Single Image Setting upload the image and remember to add the class name bg-yamm-extend-outside in Extra Class Name Option which makes the image to extend outside of the Menu Container.
Here is the screenshot for the reference
12. Output of Single Image which extend outside of the content area in Vertical Menu